7 Ways to Fix Windows Defender When It’s Grayed Out
Windows Defender is a reliable system protection tool that safeguards your device from malware and other cyber attacks.
However, this feature often gets grayed out and becomes inaccessible. When this happens, you’re unable to use the tool, and this puts your device at risk.
But don’t panic just yet; let’s take a look at how you can fix Windows Defender when it’s grayed out.
1. Disable or Uninstall Third-Party Antivirus Software
If you’ve installed a third-party antivirus program, then it might be interfering with Windows Defender. When the antivirus software is enabled, Windows Defender usually becomes grayed out or shows an error message that reads, “You’re using another antivirus program.”
So, to avoid any issues, it’s best to temporarily disable your third-party antivirus program while using Windows Defender.
If you’re unhappy with your third-party antivirus program, then uninstalling it might help tackle this problem. So, here’s how you can uninstall your third-party antivirus program:
- Type Control Panel in the Windows search bar and select the Best match.
- Click the View by drop-down menu and select Small items.
- Select Program and Features from the menu options.
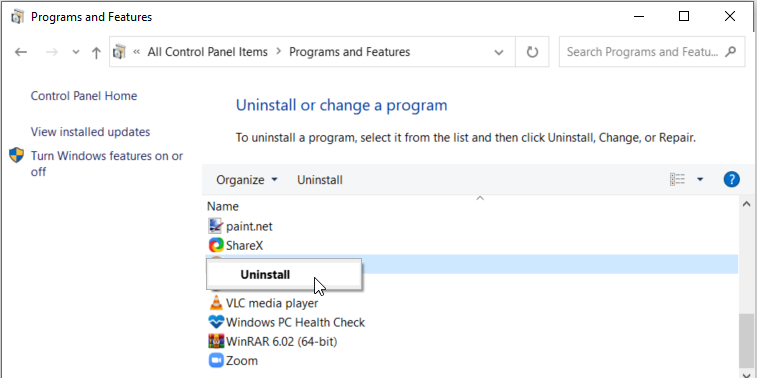
- Select the third-party antivirus program, right-click on it, and select Uninstall.
2. Restart the Windows Security Center Service
Windows Defender will only work properly if the Security Center service is enabled. So, here are the steps for restarting the Windows Security service:
- Press Win + R to open the Run command dialog box.
- Type services.msc and press Enter to open the Services window.
- Locate the Windows Security Center, right-click on it, and then click Restart.
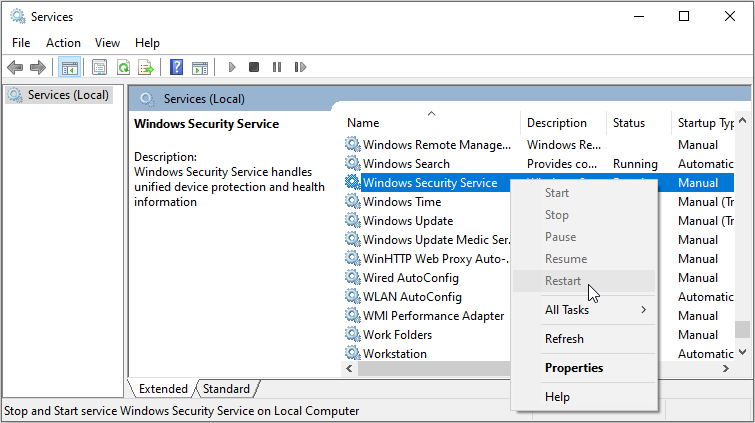
Close the Services window and restart your PC to save these changes.
3. Configure Settings in the Local Group Policy Editor
Windows Defender might be grayed out because it’s disabled in the Local Group Policy Editor. So, here’s how you can enable Windows Defender in this instance:
- Press Win + R to open the Run command dialog box.
- Type gpedit.msc and press Enter to open the Local Group Policy Editor.
- Navigate to Computer Configuration > Administrative Template > Windows Components > Microsoft Defender Antivirus.
- Navigate to the right-hand side pane and click Turn off Microsoft Defender Antivirus.
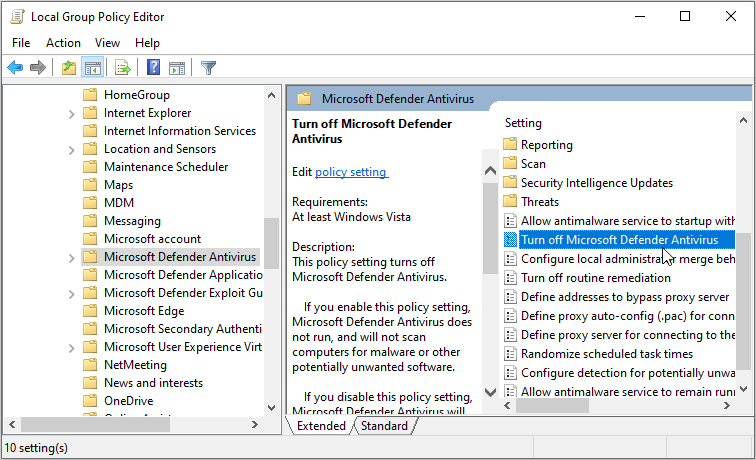
Select Not Configured or Disabled in the next screen. From there, click Apply and then click OK. Finally, close the Local Group Policy Editor and restart your device to save these changes.
If you want to tackle most issues on Windows, then try using the built-in troubleshooters.
In case this issue is caused by hardware-related issues, then the Hardware and Devices troubleshooter should help. Meanwhile, if you’re dealing with a system maintenance problem, then you could use the System Maintenance troubleshooter.
Let’s first check out how the Hardware and Devices troubleshooter could help:
- Click the Windows key and navigate to PC Settings > Update & Security and then select the Troubleshoot option.
- Click the Additional troubleshooters option.
- Select the Hardware and Devices troubleshooter and press Run the troubleshooter. Follow the on-screen instructions and then restart your PC.
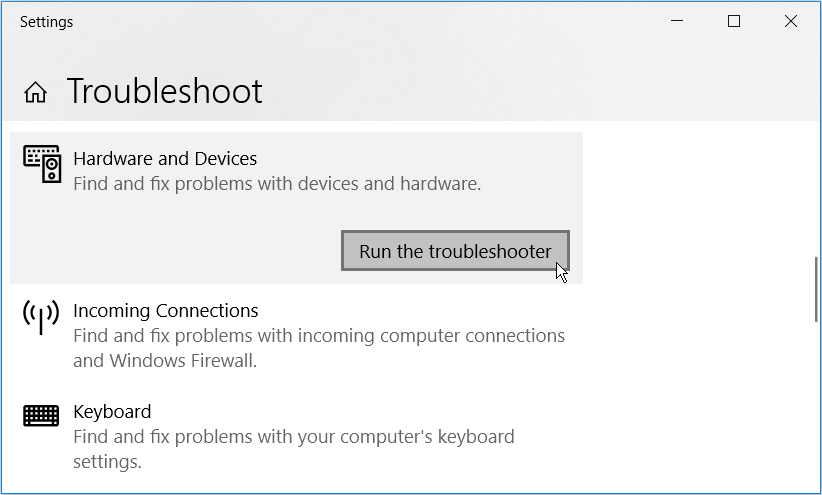
If this doesn’t resolve the issue, then try running the System Maintenance troubleshooter. Here’s how:
- Press the Windows search box icon or Press Win + S to open the search box.
- Type Perform recommended maintenance tasks automatically and select the Best match.
- Click the Advanced option and check the Apply repairs automatically box.
- Press the Next button and follow the on-screen instructions to complete the process.
5. Repair Corrupted or Missing System Files
Corrupted or missing system files often lead to various Windows system-related problems. In this case, missing or corrupted system files might be the cause of the issue at hand.
To repair corrupted or missing system files, you can use the DISM and SFC tools. These are reliable Windows features that easily handle or replace mischievous system files.
Now, let’s get started and check how you can run the DISM tool:
- Press Win + R to open the Run command dialog box.
- Type CMD and press Ctrl + Shift + Enter to open an elevated Command Prompt.
- Type the following command and press Enter:
DISM /Online /Cleanup-Image /ScanHealthWait for the scan to complete. From there, type the following command and press Enter:
DISM /Online /Cleanup-Image /RestoreHealthRestart your device when the process is complete. From there, run an SFC scan through these steps:
- Open the Run command dialog box and an elevated Command Prompt as per the previous steps.
- Type the following command and press Enter:
sfc /scannowWait for the process to complete. Finally, close the Command Prompt and restart your device.
6. Use a System Restore Point
There are times when your Windows device suddenly runs into issues randomly. In such cases, it becomes hard to determine the root of the problem. However, using the System Restore tool could help tackle the problem.
When you use the System Restore feature, your device returns to its previous state, and this gets rid of any issues.
So, if you’ve previously created a restore point on your device, here’s how you can use it to tackle the issue at hand:
- Type Create a Restore Point in the Windows search bar and select the Best match.
- Select the System Protection tab.
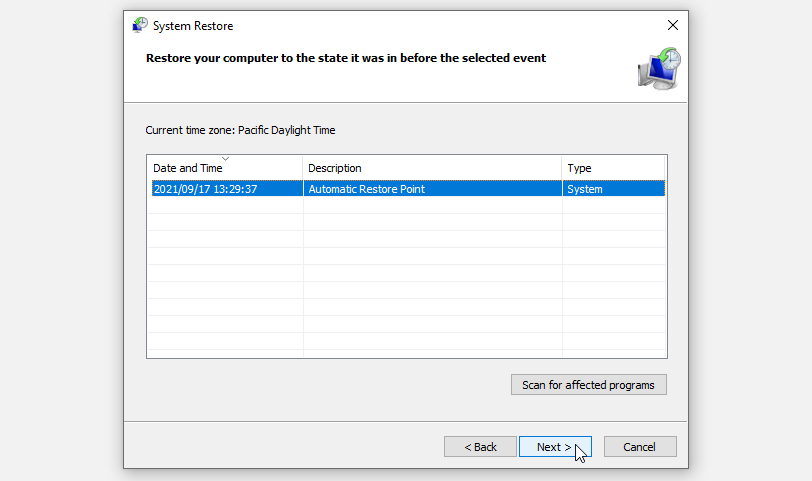
- Click System Restore and press Next.
- Select Show more restore points.
- Select the restore point of your choice and click Next. Finally, click Finish and wait for the process to complete.
7. Update Your Windows Device
Still struggling to fix the grayed-out Windows Defender tool? Then it might be time to update to the latest Windows version.
When updating your device, this installs the latest features that help get rid of system issues. So, the system update will ensure that Windows Defender and other tools run smoothly.
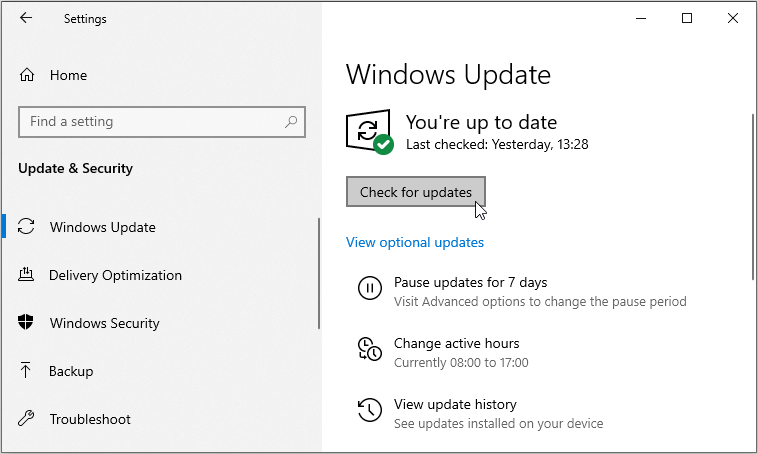
Now, here are the simple steps for updating your Windows device:
- Press the Windows key and navigate to PC Settings > Update & Security > Windows Update.
- Click the Check for updates button and follow the on-screen instructions to finalize the process.
Protect Your Device Once More With Windows Defender
If you want to protect your device from cyber threats, then you should always activate Windows Defender. But if this tool is inaccessible, you can fix it by applying any of the methods we’ve covered.
And if this tool keeps giving you issues, then you can try using other third-party security software programs.
Read Next
About The Author


