Fix NVIDIA GeForce Experience overlay not working on Windows PC
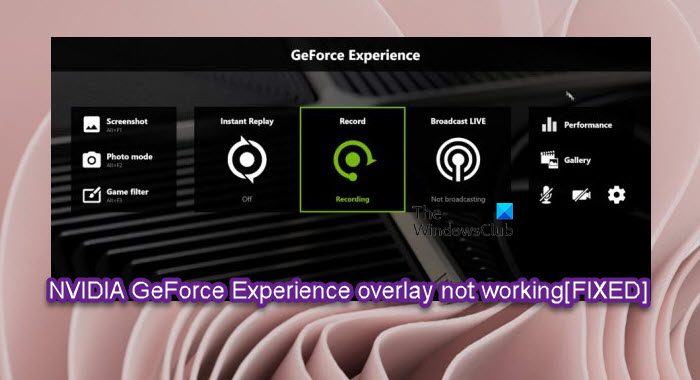
Normally, on your Windows 11 or Windows 10 gaming computer, pressing the Alt+Z key combo will bring up your NVIDIA GeForce Experience overlay. Some PC users are reporting the issue of NVIDIA GeForce overlay not working on games on their gaming device. In this post, we provide the most suitable solutions to this issue.
The likely culprits to this issue include the following:
- Old or faulty drivers
- Conflicting third-party services
- Visual C++ Redistributable package issues
- Media Feature Pack missing
- Steam capture settings
- Spotify overlay features interference
- Administrator permissions
NVIDIA GeForce Experience overlay not working
The GeForce Experience in-game overlay enables you to access GPU-accelerated video recording, screen-shot capture, broadcasting, and cooperative gameplay capabilities.
If the NVIDIA GeForce Experience overlay is not working on your Windows 11/10 system, you can try our recommended solutions below in no particular order and see if that helps to resolve the issue on your gaming PC.
- Make sure GeForce In-Game overlay is enabled
- Disable media keys and hardware acceleration in Spotify app (if applicable)
- Update your graphics driver
- Disable NVFBC Capture on NVIDIA GPU in Steam (if applicable)
- Enable experimental features
- Troubleshoot in Clean Boot state
- Repair Microsoft Visual C++ Redistributable Package
- Install Media Feature Pack
- Reinstall GeForce Experience
Let’s take a look at the description of the process involved concerning each of the listed solutions.
Before you try the solutions below, first restart your PC and make sure to run the GeForce Experience app with admin privilege, then see if the issue is resolved. If not, check for updates and install any available bits on your Windows 11/10 device and see if that helps.
1] Make sure GeForce In-Game overlay is enabled
You can begin troubleshooting to fix the issue on your Windows 11/10 system by making sure GeForce In-Game overlay is enabled. To perform this task, do the following:
- Open GeForce Experience.
- Click the gear icon to open Settings.
- In the left navigation panel, select GENERAL.
- Now, scroll down on the right pane to the IN-GAME OVERLAY section.
- Toggle the switch to On.
2] Disable media keys and hardware acceleration in Spotify app (if applicable)
It appears when Spotify overlay is in use, it interferes with the proper functioning of the NVIDIA GeForce Experience In-Game overlay. Some affected users reported they were able to resolve this issue by disabling the hardware acceleration and media keys option in Spotify app.
To disable media keys and hardware acceleration in Spotify app, do the following:
- Open Spotify.
- Click the Edit entry in the menu bar at the top of the window.
- Choose Preferences (alternatively, press the Ctrl + P key combination) from the list of options in the menu.
- Now, scroll down to the Display Options section.
- At the section, locate the Show desktop overlay when using media keys option and toggle the button to Off.
- Next, scroll down further and click the Show Advanced Settings to open advanced settings.
- In advanced settings page, scroll down to the Compatibility section.
- At the section, toggle the button for the Enable hardware acceleration option to Off.
Once done, you can reopen the GeForce Experience client and the issue should be resolved. If not, continue with the next solution.
3] Update your graphics driver
The issue at hand is likely to occur due to corrupt or outdated graphics drivers. In this case, to resolve the issue, update the graphics card driver on your gaming PC.
The following are options available for you:
4] Disable NVFBC Capture on NVIDIA GPU in Steam (if applicable)
Do the following:
- Launch Steam client.
- Click the Steam button at the menu bar at the top right part of the window.
- Select Settings.
- In Settings page, on the left navigation pane, select the In-Home Streaming tab.
- Now, on the right pane under the Advanced Host Options section, clear the checkbox for the option Use NVFBC capture on NVIDIA GPU.
- In the Steam window, click the Steam button again and click Exit to quit Steam completely.
Once done, you can reopen the GeForce Experience client and see if the issue in focus is resolved. Otherwise, continue with the next solution.
5] Enable experimental features
Enabling experimental features in GeForce Experience allows you to access updates and features that haven’t been released to all users. This solution requires you to enable experimental features and see if that solves the problem.
Do the following:
- Open GeForce Experience.
- Click the gear icon to open Settings.
- In the left navigation panel, select GENERAL.
- Under the ABOUT section, checkmark the option Enable experimental features. A GeForce Experience update may be required.
Once done, check if the GeForce in-game overlay is now working. If not, try the next solution.
6] Troubleshoot in Clean Boot state
You may experience the issue in view due to third-party services preventing GeForce overlay from working properly. In this case, to resolve the issue, you can troubleshoot in Clean Boot state by temporarily disabling all services except NVIDIA services, and reboot your system. On boot, if GeForce overlay starts working again, then you can try to enable third-party services one at a time to figure out the problematic services. Afterwards, restart your computer to apply the changes.
Read: NVIDIA GeForce Experience unable to open Share
7] Repair Microsoft Visual C++ Redistributable Package
The Microsoft Visual C++ Redistributable Packages ensures some programs work and function properly without experiencing conflicts on your Windows 11/10 PC. If these redistributables are corrupt, it may cause the GeForce overlay to not work normally.
To repair the Visual C++ Redistributable via Settings app, do the following:
- Open Settings app.
- Click Apps on the left navigation pane.
- Now, scroll down on the Apps & features right pane.
- Click the ellipsis (three vertical dots) for the installed Visual C++ Redistributable.
- Select Modify.
- Click Repair.
- Follow the on-screen instructions to finish the repair operation.
- Repeat for all other versions of the package installed on your system.
Alternatively, you can repair the Visual C++ Redistributable via Programs and Features on your Windows 11/10 computer by following the instructions in the guide on how to fix Runtime Error R6034.
8] Install Media Feature Pack
Since media-related features don’t ship with Windows 11/10 K/N/KN editions, if you’re experiencing the issue in focus and you’re running the K/N/KN edition of Windows, you can try installing the Media Feature Pack and see if that resolves the issue you’re currently facing.
9] Reinstall GeForce Experience
At this point, if nothing has worked so far to resolve the issue at hand, it’s most likely due to inconsistencies or corrupt GeForce Experience app installation files. In this case, to resolve the issue, you can reinstall the entire application to fix the problem on your gaming PC.
To apply this solution, you can uninstall the GeForce Experience app via the Settings app or Control Panel, reboot PC, and then download from NVIDIA official website the latest version of the app and reinstall on your Windows 11/10 gaming device.
Related post: Discord Overlay not working in Windows.
How do I open overlay in GeForce Experience?
Simply hit the “Alt+Z” hotkey or the Share icon to access the powerful capture and record features. With this overlay you can easily tap into GeForce Experience’s ability to record gameplay at 60FPS at up to 4K, for both full screen and windowed modes.
Is ShadowPlay better than OBS?
One of the difference between ShadowPlay and OBS is effect on CPU Performance. ShadowPlay does not affect CPU performance even while extending its support to higher framerates. On the other side, OBS causes a great effect on CPU performance even while working on limited frame rates. NVIDIA ShadowPlay offers a much better output with a lot less lag than recording through OBS.
Is GeForce good for recording?
The GeForce Experience, a companion app for the video cards makes it extremely simple to record gameplay footage. If you have a PC with an NVIDIA card – and most gamers do – there is no need to install anything. If you’re playing a game that is less CPU intensive, it won’t affect performance as much. If you’re using a GPU-bound encoder, it will affect performance more.
Is ShadowPlay free?
NVIDIA’s ShadowPlay can have up and down performance depending on your PC configuration. But it’s free, easy to use, and can be tweaked for straight-up recording, grabbing the last few action-packed minutes of your game, or broadcasting your adventures on Twitch. Keep in mind that if you are running ShadowPlay features like instant replay, record, or live stream, it will affect FPS to varying levels depending on GPU.


