

You may experience a black screen while using the Oculus Link via the Oculus app when your Oculus Link does not work properly. Oculus Link can stop working for several reasons, including outdated graphics drivers and damaged installation files.
This problem can occur due to an underlying corruption affecting the local installation of Oculus due to the oculus driver currently in use or because of an outdated GPU or malfunctioning driver that is not equipped to sustain the Oculus link connections.
Due to the wide range of users affected by the problem, various solutions are available to fix the issue. We have compiled a list of the possible methods you can implement to resolve the mentioned problem. Follow the solutions below to get your Oculus Link to a working state.
1. Repairing the Oculus client
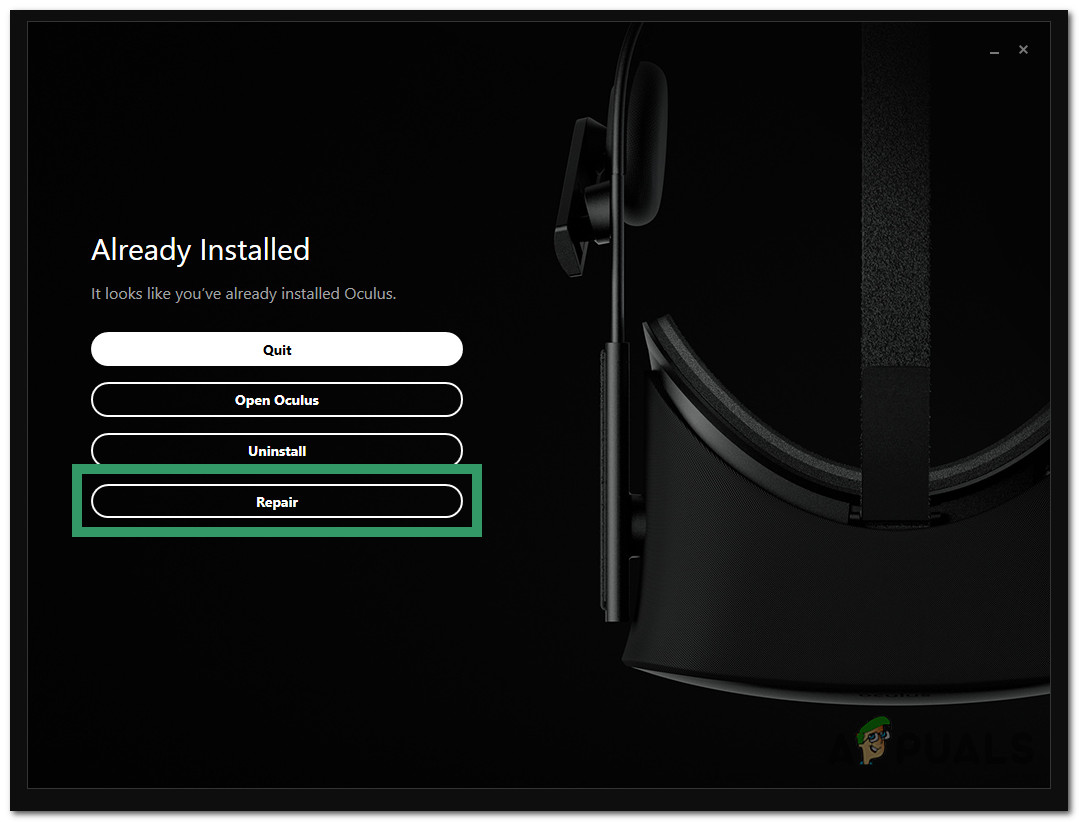
If you’re starting to troubleshoot this issue, you should try to repair the current Oculus Link installation with the built-in setup.
To do this, navigate to the path where you installed the Oculus supporting software and run OculusSetup.exe with admin access by right-clicking it and clicking on Run as Administrator.
The default location is C:Program FilesOculusOculusSetup.exe.
Note: If you installed the Oculus supporting software in a different location, navigate there instead.

Note: If you are prompted by the User Account Control (UAC), click Yes to grant admin access.
From the first screen, choose the Repair opinion and follow the remaining steps to initiate and complete the repair operation.
Once the repair procedure is complete, reboot your PC and see if the Oculus link is re-established.
If the problem is still not fixed, move to the next method below.
2. Reinstall the Oculus driver
Reinstalling the Oculus drivers will eliminate any driver-related inconsistency that are causing this issue
We recommend using an elevated Command Prompt since it will eliminate any remnant files that might get left behind if you uninstall the driver conventionally.
Here’s how to reinstall the Oculus driver from the elevated Command Prompt:
- Start by ensuring that your Oculus device is plugged into your PC.
- Press the Windows key + R to open up a Run dialog box.
- Inside the Run dialog box, type the following path before pressing Enter:
C:Program FilesOculusSupportoculus-drivers

Access the Oculus drivers - Once you arrive at the correct location, open oculus-driver and wait until the supporting driver is updated.
- Restart your PC, launch the Occulus app once again and see if the Oculus Link connection is functioning properly.
If the problem is still not fixed, move to the next method below.
3. Update GPU drivers
One of the causes of the problem can be your outdated graphics drivers. Virtual Reality and games rely on the graphics card a lot, and having the latest device drivers installed on your computer can often be essential.
Updating your graphics drivers is not complicated at all. Windows installs any missing drivers that it can detect on your computer automatically. However, these drivers are usually not up to date. Therefore, you need to update your graphics card manually.
To do this, you will have to download the latest drivers for your card from your manufacturer’s website after uninstalling the current ones. Follow the instructions below:
- First, press the Windows key + R to open the Run window.
- Next, access Device Manager by typing “devmgmt.msc” into the run box, then hitting the Enter key.

Open Device Manager - After opening Device Manager, scroll down the page until you reach the list of installed devices, and then expand the drop-down box for Display Adapters.
- Right-click on the GPU driver you want to update in the following menu, and then click on Update Driver.
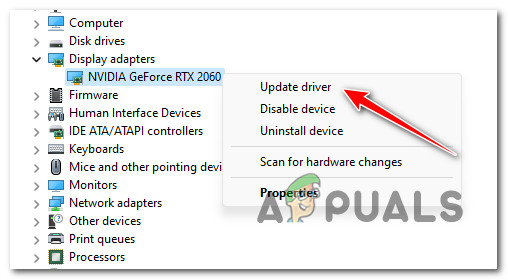
Update the GPU driver Note: If you have an integrated GPU under Display Adapters, update it too.
- From the menu that appears, choose Search Automatically for New Driver Software.
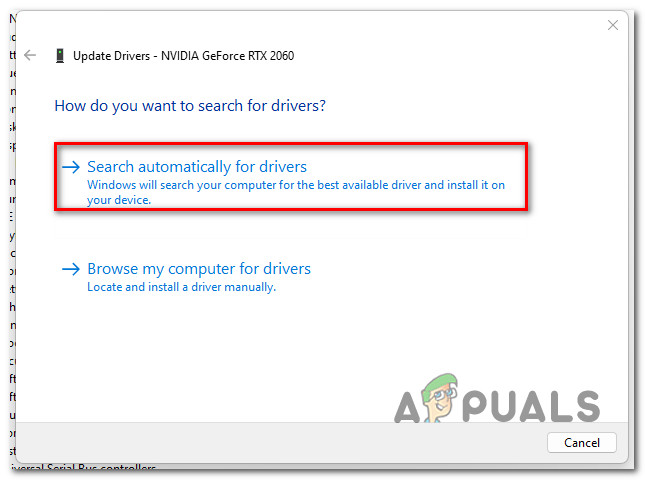
Update drivers automatically - Follow the on-screen steps to install the most recent GPU driver discovered after the initial scan is complete.
- See if the problem is now resolved by rebooting your PC and seeing if the PCVR connection with Oculus Link is restored.
Note: if Device Manager fails to update your graphics drivers, you will need to use the specialized software supplied by your graphics card vendor. There is a possibility that the following applications will be needed, depending on the GPU manufacturer:
Continue to the next step in the procedure below if the same problem is still present or your GPU drivers are already up to date.
4. Force Occulus to run in Maximum Performance mode
A power setting can also be responsible for affecting the PCVR Oculus link with your PC. To make sure that the connection ins’t interrupted by a Power Saving function, make sure that the PCVR connection is allowed to use the Maximum performance power plan mode.
To do this, you’ll need to access the Power Settings menu and change the current plan settings so that all USB Settings and PCI Express connections are all managed on Maximum power savings mode.
For step by step instructions, follow the instructions below:
Note: If you experience this problem on a laptop that uses multiple power plans, you will need to make the below modifications for every plan that might become active on your PC.
- Press Windows key + R to open up a Run dialog box.
- Next, type ‘powercfg.cpl’ and press Ctrl + Shift + Enter to open the Power Options menu with admin access.

Access the power Settings - If you are prompted by the User Account Control (UAC), click Yes to grant admin access.
- Next, click on the Change plan settings of the active plan.
- From the next screen, click on Change advanced power settings.

Change advanced power settings - Inside the Power Options menu, scroll down through the power plan settings and expand the drop-down menu associated with USB settings.
- Make sure USB Selective suspend setting is disabled for all available plans.
- Next, expand the PC Express drop-down menu, and disable Link State Power Management for all the available plans.
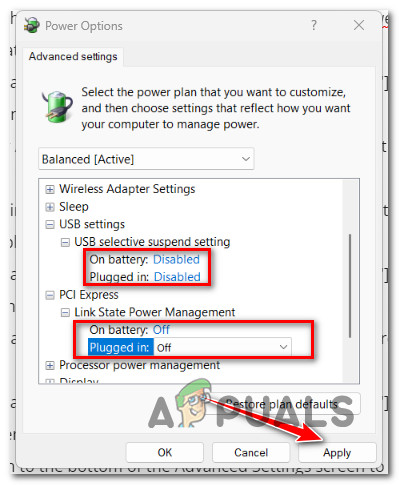
- Click Apply so save the changes.
- Reboot your PC and see if the you can no re-stablish the Oculus link connection.
If the problem is still not fixed, try the next method below.
5. Disable integrated graphics card
Some processors come with an integrated graphics card. Integrated graphics are mostly used to render the basic graphics on your screen and are not to be intensively used by other dedicated apps.
While a dedicated graphics card is far better than an integrated one, the presence of drivers for the integrated graphics can confuse some apps. In essence, the application thinks there are two graphics cards available, and it can sometimes choose the wrong to use for itself.
If this applies to you, disabling the graphics drivers of your integrated graphics should fix the problem for you. When you do this, the Oculus app will be forced to use the dedicated graphics card on your computer, and it will start working properly. Follow the instructions below to do this:
- Press Windows key + R to open up a Run dialog box.
- Next, type ‘devmgmt.msc’ and press Ctrl + Shift + Enter to open up Device Manager with admin access.

Open Device Manager - At the User Account Control (UAC), click Yes to grant admin access.
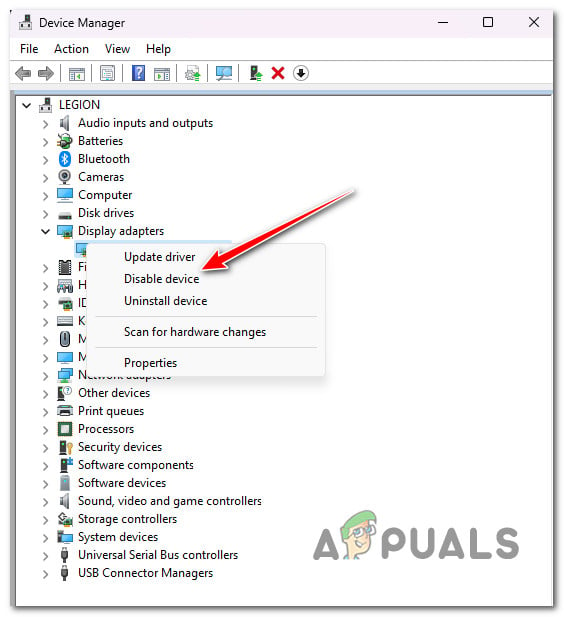
- Once you’re inside Device Manager, scroll down through the list od devices and expand the drop-dowm menu associated with Display Adapters.
- Next, right-click on the integrated GPU and click on Disable Device from the context menu that just appeared.
Disable the integrated GPU - At the confirmation prompt, click Yes, then close Device Manager and reboot your PC.
- Once your computer boots back up, see if the Oculus Link is now re-established.
If the problem is still not fixed, move down to the next method below.
6. Disable 3rd party antivirus or firewall (if applicable)
This error may also appear if the data transmission is blocked by your antivirus software so the PCVR connection cannot be maintained.
If you’re using a third-party suite and you are certain that you are using the latest unaltered version of Oculus software, you test this scenario by disabling real-time protection.
Important: The specific steps for disabling real-time protection will vary depending on the third-party suite you’re using, but the vast majority of antivirus programs will have an option to do so in the application’s taskbar menu.

Once you’ve disabled real-time security, restart your computer and see if you can now re-establish the VR link connection with Oculus.
Note: You may want to ditch your security suite if you’ve already tried disabling any unnecessary add-ons and the problem persists. Make sure there are no leftover files lest behind by your AV by cleaning any AV files left behind by the uninstallation process.
If this method was not applicable or it didn’t fix the Oculus Link connection, move down to the next method below.
7. Disable all power-saving options for the USB port used by Oculus
To make sure that all power-saving options for the USB port used by Oculus is disabled, use Device Manager to disable every Power Management rule for every “USB 3.0/3.1/3.10 eXtensible” item.
Here’s a quick guide on how to do this:
- Press Windows key + R to open up a Run dialog box.
- Next, type ‘devmgmt.msc’ and press Ctrl + Shift + Enter to open up Device Manager with admin access.
Open Device Manager - At the User Account Control (UAC), click Yes to grant admin access.
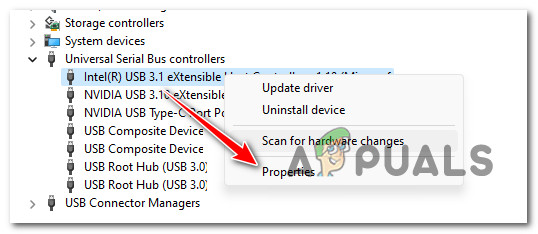
- Once you’re inside Device Manager, scroll down through the list od devices and expand the drop-dowm menu associated with Universal Serial Bus controllers.
- Next, right-click on the first eXtensible Host Controller and click on Properties from the context menu that just appeared.
Access the Properties screen - Next, inside the Properties screen of the eXtensible Host controller device, choose Power Management and make sure the Allow the computer to turn of this device to save power option is disabled.
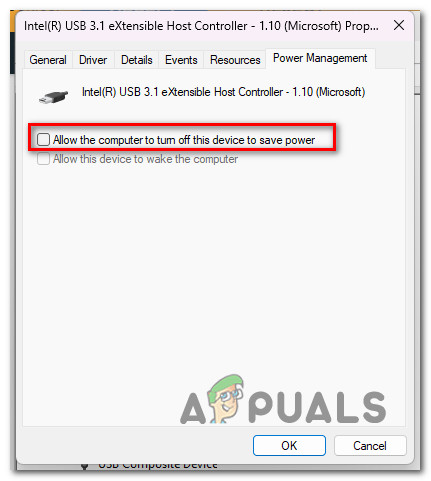
Turn off the device to save power - Click Ok to save the changes, then repeat step 6 with every other extensible host controller that you have under Universal Serial Bus Controllers.
- Reboot your PC and see if the Oculus Link connection can now established again.
If the problem is still not fixed, move to the final potential fix below.
8. Revert Ryzen Chipset Drivers (if applicable)
If you are using a Ryzen processor, there is a good chance that your Ryzen Chipset drivers cause the problem. This can happen due to a compatibility issue with the Oculus headset.
In such a scenario, you can revert your Ryzen chipset drivers to fix the issue. Several Ryzen users have found this to fix the problem for them.
To revert your Ryzen chipset drivers, you can uninstall the currently installed Ryzen drivers on your computer and then perform a restart. Upon a restart, Windows will automatically install the drivers for you. Follow the instructions below to do this:
- Open up the Control Panel by searching for it in the Start Menu.
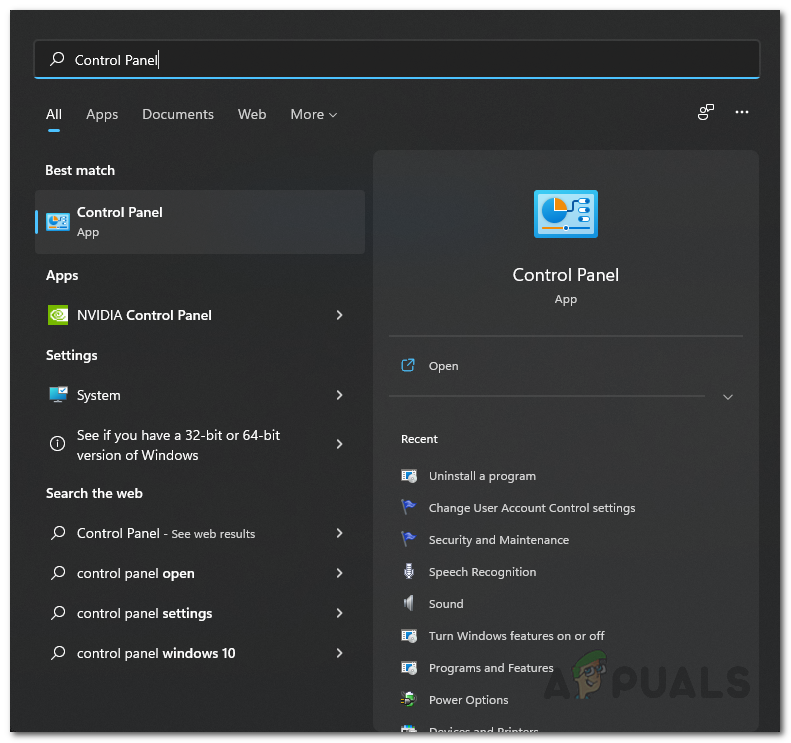
Opening Control Panel - On the Control Panel window, click on the Uninstall a program option.
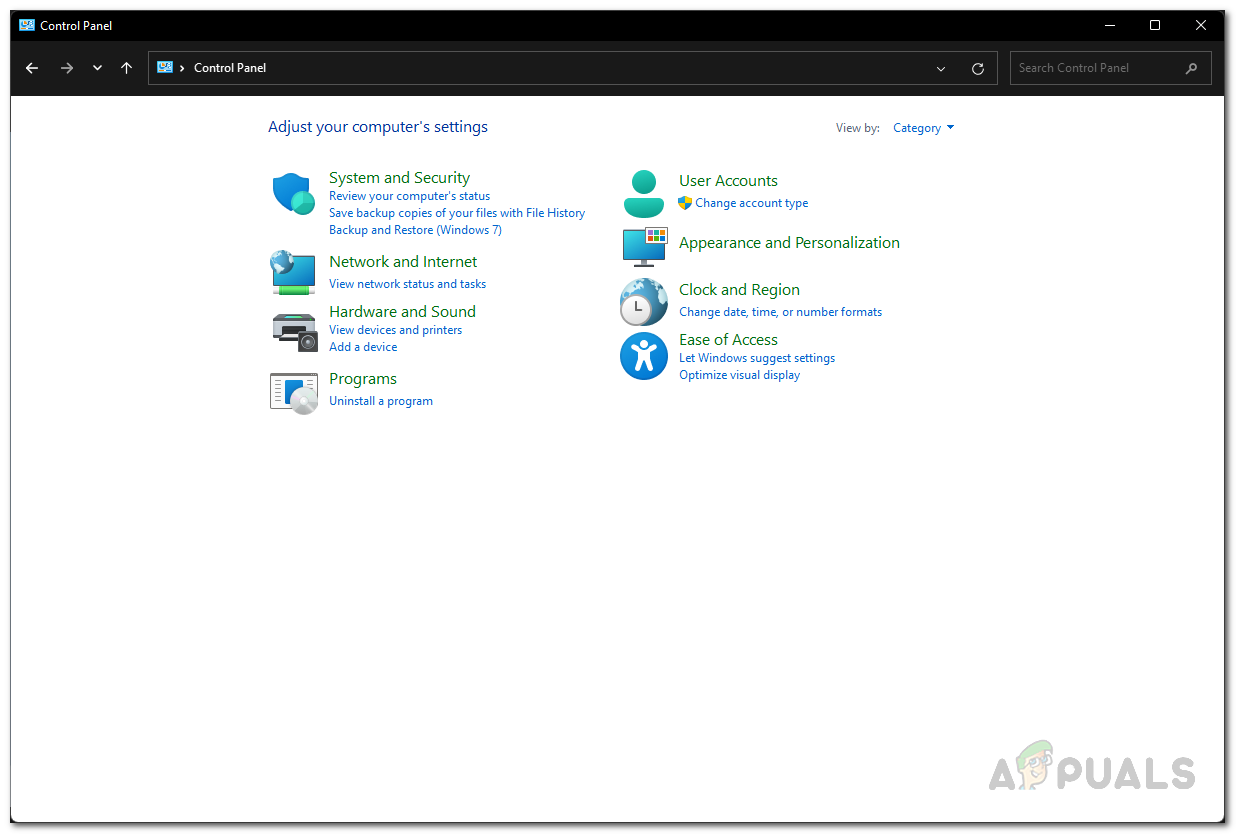
Control Panel - From the list of installed applications, locate AMD Chipset Software.
- Double-click on AMD Chipset Software and follow the on-screen prompts to uninstall it.
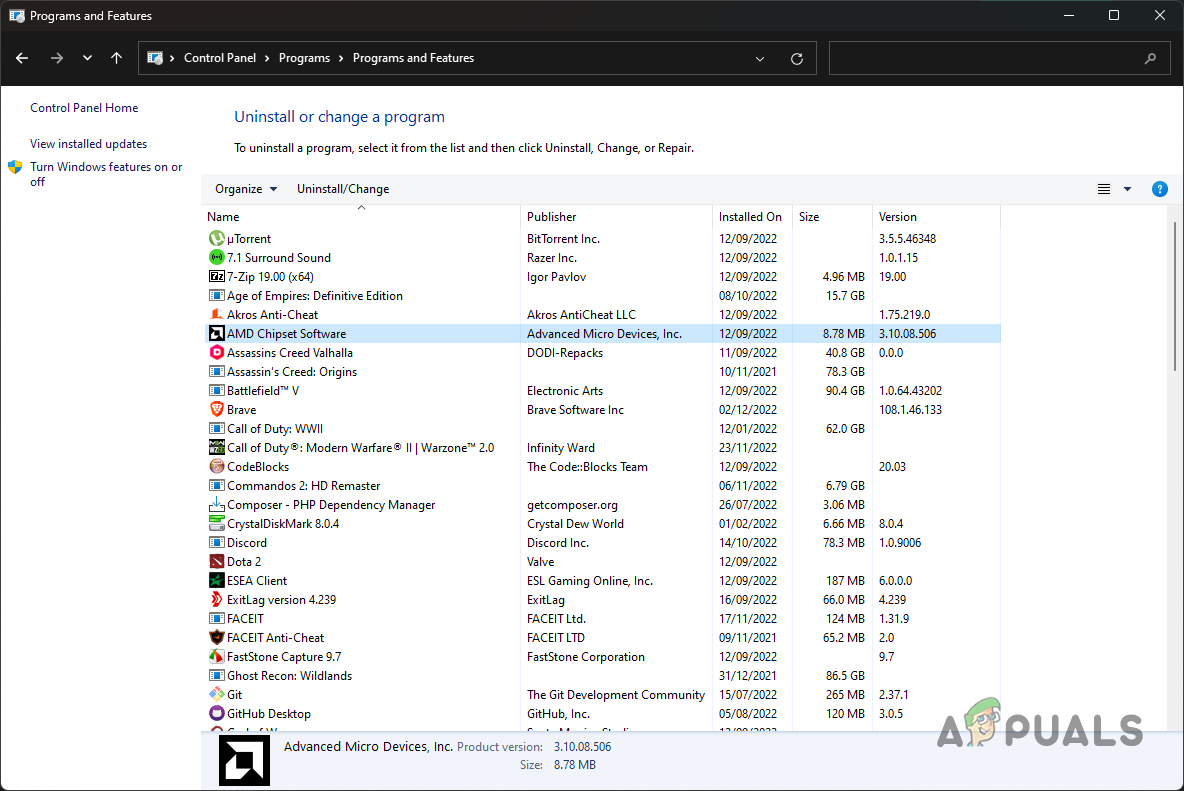
Uninstalling AMD Chipset Software - Once it has been uninstalled, go ahead and restart your computer.
- After your PC boots up, see if the problem has gone away.
9. Use a different USB cable and port for your Oculus connection.
If you’ve come this far without a viable fix, one final reason that might cause this Oculus Link connection issue is a malfunctioning USB port or a non-congruent cable.
So before losing hope and opening a ticket with Meta, use a different USB cable to connect Oculus with your PC and plug it in a different USB port.
Note: Avoid plugging it into a USB hub if possible.
This may help if the issue is caused by a problem with the cable or the USB port you’re using, or if the data transmission is being inhibited by a non-congruent cable.